
We are doing a series where we react to Tile Tik Toks. The video above is a clip from our latest episode.
Cecelia Leger has a great video where she lays a marble shower floor and she brings up some really good points.
If you’ve worked with marble for any length of time—especially on shower floors—you already know it’s not forgiving. It stains easily, it absorbs unevenly, and once something goes wrong, it tends to show up everywhere!
A lot of people seal the top of the marble floor pre-grouting, and that is fantastic. It is considered a good practice.
But I’ll do you one better…
How about Pre-Sealing?
When installing any type of natural stone, we like to “pre-seal” the tile with a contaminant sealer.
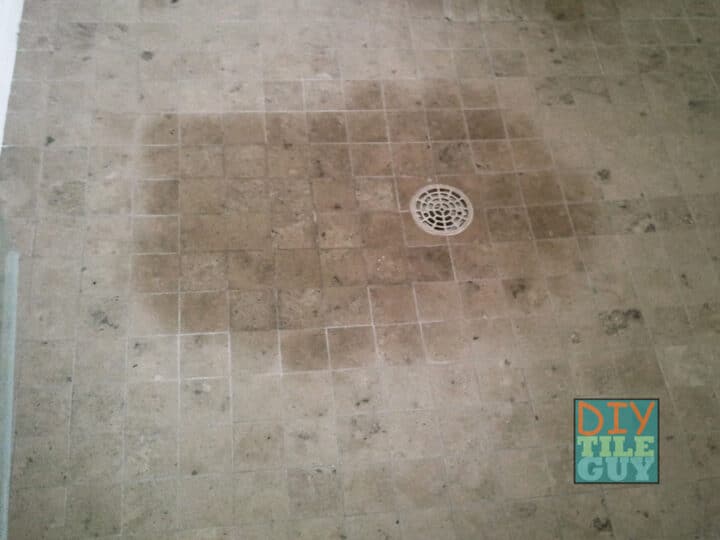
This will keep the top of the shower floor from looking ugly by moisture accumulation on the surface around the drain, which tends to happen if you don’t seal the shower floor.
Why Marble Needs a Different Approach

Marble is porous. Not just “a little bit”—I’m talking VERY porous, especially in honed finishes and mosaics.
During a typical install, it gets hit with moisture from three directions:
- Thinset during installation
- Grout during finishing
- Daily water exposure once the shower is in use
If you wait until the very end to seal it, you’re basically letting the stone absorb everything first—and trying to fix it after the fact!
The Two-Step Sealing Strategy (Before Final Sealing)
Step 1: Light Pre-Seal Before Installation
This is your primer coat.
You’re not trying to fully protect the stone—you’re just taking the edge off its absorbency.
This will slow down moisture absorption from thinset, and make it easier to clean.
How to do it:
Apply a light coat of penetrating sealer, face only (edges are okay), never touch the back of the tile, and then buff it completely dry—no residue left behind
Think of this as leveling the playing field before the tile even hits the floor.
Step 2: Seal Again Before Grouting
Once the tile is set and the thinset has cured, you’re about to introduce grout—which carries pigment, moisture, and fines straight into the stone if it’s unprotected.
This step will prevent grout pigment from staining the marble, keeps grout haze from locking onto the surface, which will make cleanup faster and more consistent.
Here’s how you do it:
Make sure the tile is clean and fully cured, apply another light coat of sealer, buff it off completely, let it cure per manufacturer before grouting.
Skipping this step is one of the most common reasons marble ends up looking dirty right out of the gate!
Why Doing Both Works
Each stage of the install introduces a different risk:
Pre-seal controls thinset moisture and early absorption while pre-grout seal controls staining and cleanup during finishing.
You’re not overdoing it—you’re managing exposure at each phase instead of trying to fix everything at the end!
Where This Matters Most
This approach really pays off in shower floors (especially mosaics) – tons of grout joints = high exposure to moisture. White or light marble – shows every mistake. Honed or tumbled finishes – more porous than polished and high-end installs – where consistency actually matters.
Where Guys Get Into Trouble
Over-sealing
More is not “better”.
If you load the surface with sealer you risk grout not bonding properly, getting uneven grout color and residue can cause hazing that’s harder than the original problem.
This system only works if each coat is light and controlled!
Rushing cure times
In a humid place like Southwest Florida, this matters even more. Let thinset cure before the second seal and let sealer cure before grout
Cutting corners here defeats the whole process.
Don’t Skip the Final Seal
Even if you pre-seal and pre-grout seal, you’re not done.
After grout cures, you still need: a full, even sealing of both stone and grout together
That’s your long-term protection layer.
Let’s wrap it up.
Pre-sealing before installation and sealing again before grouting isn’t overkill—it’s a controlled, professional workflow for marble, especially in wet areas.
Do it lightly, do it at the right times, and you’ll avoid most of the issues that give marble a bad reputation in showers. Skip it—or overdo it—and you’ll see the difference pretty quickly.
Thank you for reading!
If you enjoy this content, make sure to follow us on social media. We want to you quality tile content every week.
You might be interested in this article we wrote about caulking shower corners.