
When most homeowners look at a finished tile floor, they see the tile, grout joints, and overall pattern.
What they don’t see is the mortar underneath it.
But that hidden layer has a lot to do with whether the tile stays firmly bonded for years—or eventually starts sounding hollow, cracking, or coming loose.
That’s why directional troweling matters.
In the video Rob is reacting to, the installer demonstrates the difference between swirling mortar around randomly and combing it into straight, consistent ridges. The straight ridges collapse much more effectively when the tile is pressed into place.
Rob agrees with the method, but adds an important detail:
On rectangular tile, the direction you trowel matters too.
What Is Directional Troweling?

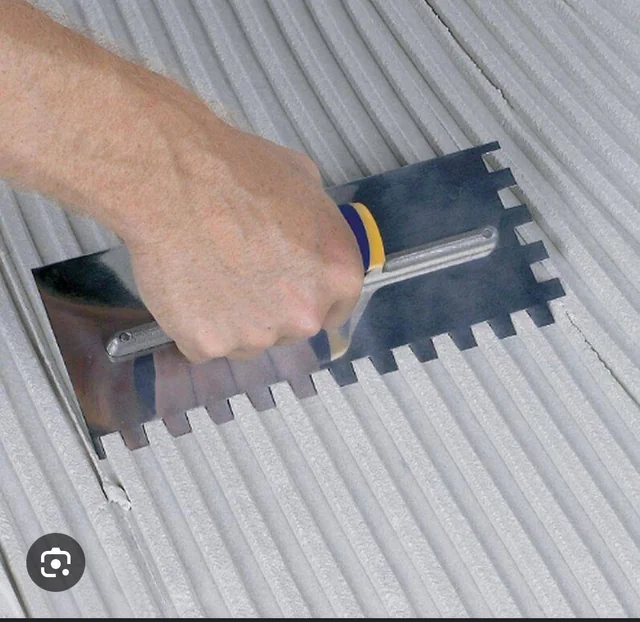
When thinset mortar is spread with the notched side of a trowel, it leaves a series of ridges.
Those ridges need somewhere to go when the tile is pressed down.
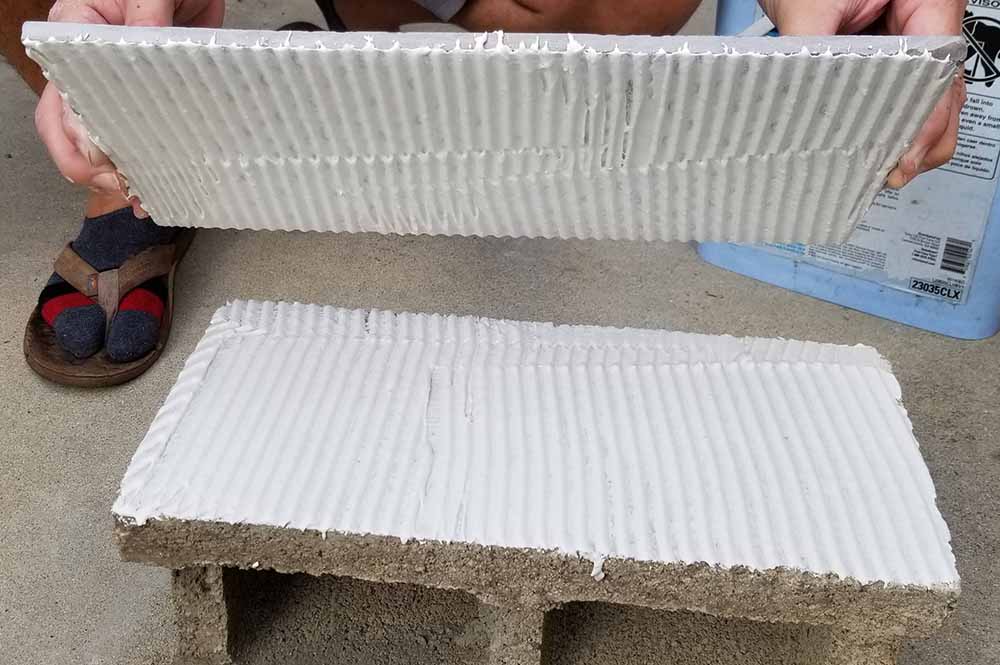
If the mortar has been swirled around in different directions, pockets of air can become trapped underneath the tile. The tile may feel like it’s bonded, but there can still be large unsupported areas below it.
With directional troweling, the mortar ridges all run parallel.
When the tile is placed into the mortar and moved slightly back and forth across those ridges, they collapse together and push air toward the edge.
That gives us better contact between the tile, mortar, and substrate.
And better contact means better mortar coverage.
Give the Air the Shortest Way Out
This is where Rob adds another piece to the conversation.
Suppose you’re installing a 6-by-36-inch plank tile.
Technically, you could comb the mortar parallel with the 36-inch length.
But think about what you’re asking the air underneath the tile to do.
Some of that air may need to travel a long way before it reaches an open edge.
Instead, Rob prefers to run the mortar ridges across the 6-inch direction.
Now the trapped air only has a short distance to travel before it can escape.
The principle is simple:
When possible, orient your directional troweling so air has the shortest path out from underneath the tile.
On a square tile, that distinction may not matter much.
On a long plank tile, it can make a big difference.
Why Coverage Is So Important
A tile can look perfectly installed from the top and still have poor coverage underneath.
If large areas of the tile aren’t supported by mortar, those hollow areas become weak spots.
That can contribute to cracked tile, broken corners, or tiles eventually loosening from the floor.
This becomes especially important with large-format tile because one piece covers so much area.
That’s why experienced installers don’t simply spread mortar, drop the tile down, and assume everything worked.
Occasionally, we’ll lift a freshly set tile and inspect the back.
We want to see that the mortar ridges actually collapsed and made good contact across the tile.
Don’t Forget the Back of the Tile
Rob also points out another step that helps improve the bond: keying mortar into the back of the tile.
Often called back-buttering, this means using the flat side of the trowel to work a thin coat of mortar into the tile before setting it.
We aren’t trying to build another giant layer of ridges on the back.
We’re filling the texture and small imperfections in the tile surface so the mortar on the floor has a better surface to bond with.
This is particularly helpful with large-format porcelain.
The combination is straightforward:
Key mortar into the back of the tile, directionally comb the mortar on the substrate, set the tile into the ridges, and move it across them to collapse the mortar.
None of those individual steps are complicated.
Together, they make a much better installation.
Little Techniques Have Big Consequences
Directional troweling is a great example of why tile installation can look easier than it actually is.
From across the room, spreading mortar is just spreading mortar.
But an experienced installer is thinking about the size and shape of the tile, which direction the ridges should run, how the air will escape, whether the mortar is still workable, and whether proper coverage is being achieved.
Those details disappear as soon as the tile is installed.
That doesn’t make them any less important.
Thank you for reading!
If you are interested in learning more about this topic, here’s a good read on what our guys call “the Cadillac of thinsets”.