
Some tile jobs look simple when they are finished, but there is usually a lot of planning behind the scenes.
That is especially true with a patterned shower wall.
In this video, Mats Olson, one of our tile installers, explains how he approached this shower installation. The wall tile has a straight herringbone pattern, which means the layout had to be thought through carefully before the tile ever went on the wall.
With a pattern like this, you cannot just start sticking tile up and hope it works out. The goal is to make the pattern feel like it continues naturally around the shower without awkward breaks, strange slivers, or pieces that look out of place.
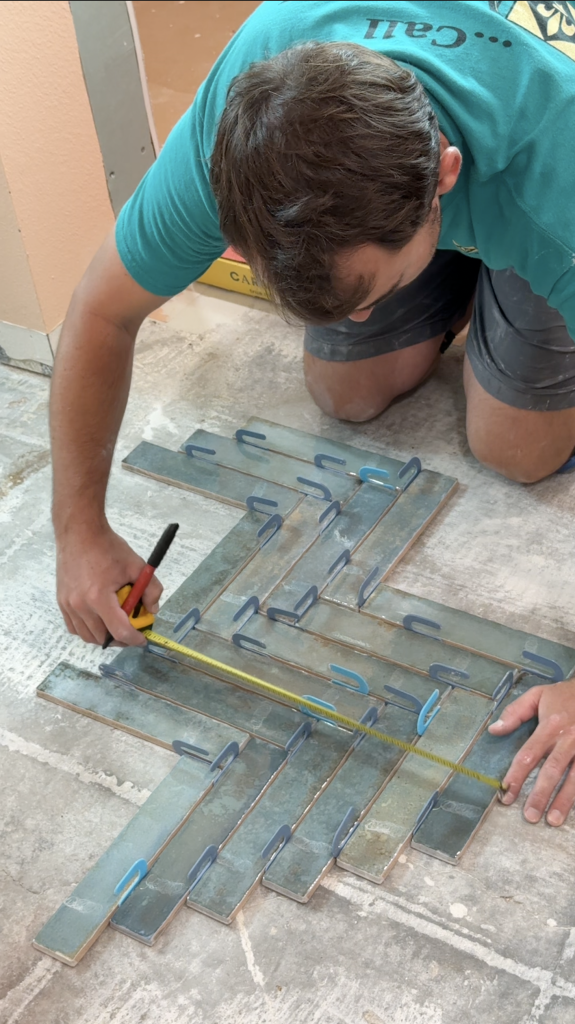
Starting With a Full Tile
One of the first things Mats explains is that he started with a full tile on the wall.
That may sound like a small detail, but it matters. Where you start determines where everything else lands.
If the first piece is not planned well, the pattern can end up creating tiny cuts at the edges, awkward pieces near the ceiling, or a layout that feels unbalanced. Starting with a full tile in the right spot gives the installer a cleaner reference point and helps the pattern build in a more controlled way.
Mats started from the bottom of the bench and then worked his way up.
Keeping the Pattern Moving Around the Walls
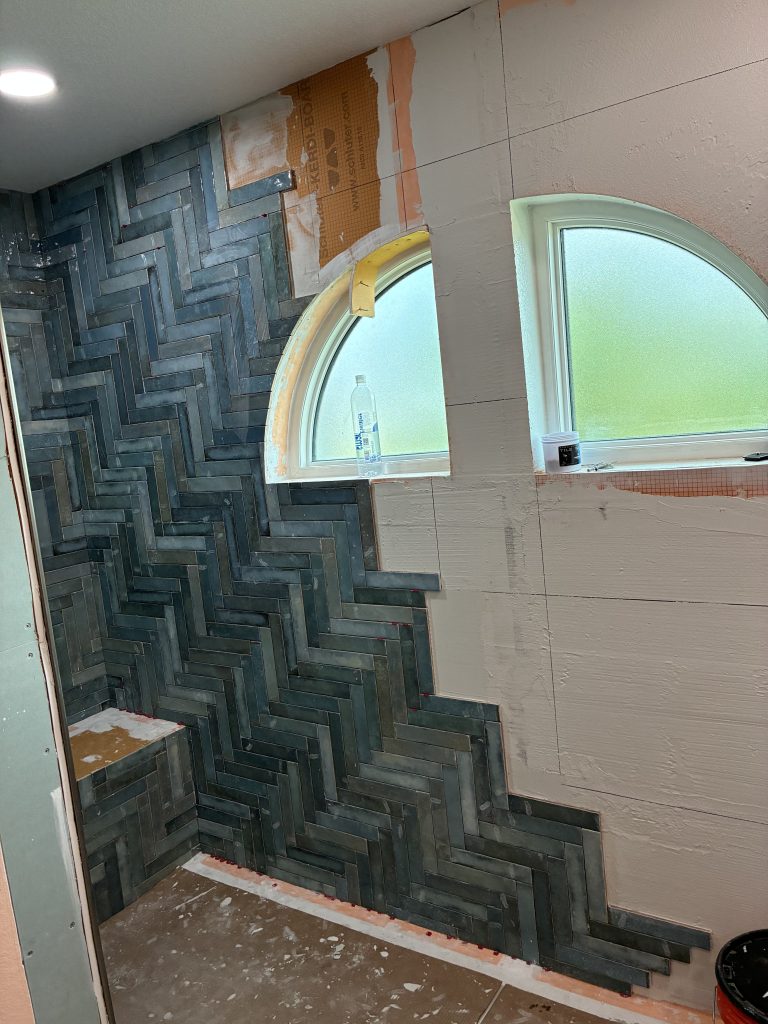
Because this tile has a strong directional pattern, he wanted the design to feel like it continued around the shower.
That means he was not only thinking about one flat wall at a time. He had to think about how the pattern would turn corners, meet the side walls, and visually “stair step” up the shower.
This is where tile layout becomes part craftsmanship and part puzzle!
When a pattern wraps around multiple walls, the installer has to decide which lines matter most, where the eye will naturally go, and how to make the overall space feel intentional. Sometimes that means making small adjustments so the pattern looks better as a whole.
Finding the Right Starting Height
Mats also talks about where he started height-wise.
That is another important part of shower wall layout. The starting height affects where the tile lands at the floor, the ceiling, the niche, the plumbing fixtures, and the corners.
If you start too low or too high without checking the full layout, you may end up with tiny cuts in very visible areas. Nobody wants to get all the way to the ceiling and realize the final row is a thin sliver.
That is why installers often measure, dry-lay pieces, and check the full wall before setting tile. It takes extra time upfront, but it helps avoid problems later.
Avoiding Small Cuts and Sliver Pieces
One of the biggest things Mats points out is the goal of avoiding small cuts or sliver cuts.
Small slivers are usually not ideal because they can look awkward, be harder to install cleanly, and make the layout feel like it was not planned. Sometimes small cuts are unavoidable, especially in older homes where walls and ceilings are not perfectly level or square. But a good installer tries to minimize them, especially in the most noticeable areas.
That does not always mean every piece will be full-sized. It means the cuts should feel balanced and intentional.
There is a big difference between “we had to make this adjustment because the room required it” and “we did not plan ahead, so now we are stuck with this tiny piece.”
Dry-Laying the Tile First
In the video, you can see tile being laid out before installation. This is one of the best ways to understand how a pattern is going to land.
Dry-laying gives the installer a chance to see the pattern, measure the pieces, and make decisions before thinset is involved. Once tile is being installed on the wall, changes become harder and messier.
For a patterned tile like this, dry-laying is especially helpful because it lets you see how the design repeats. It also helps the installer figure out where the cuts will be and whether the layout needs to shift before the first row goes up.
Working With Real-World Walls and Ceilings
Another point that comes through in the video is that real spaces are not always perfect.
Walls may be slightly out of plumb. Ceilings may not be perfectly level. Corners may not be perfectly square. That is normal, especially in remodel work.
A good tile installer has to work with the space as it actually exists, not the space as it would appear on a perfect drawing.
That is why layout decisions matter so much. Sometimes the goal is not mathematical perfection in one tiny spot. The goal is a finished shower that looks clean, balanced, and well-planned when you step back and see the whole thing.
The Finished Look Starts Before the Tile Goes Up
A shower like this does not come together by accident.
The finished result depends on planning the starting point, checking the height, understanding the pattern, avoiding awkward cuts, and making sure the tile flows from wall to wall.
We believe good tile work starts long before the first tile is set. The prep and layout may not always be the most exciting part to watch, but they are what make the finished shower look intentional.
Because once the tile is installed, the pattern tells the story.
And we want that story to look like it was planned from the beginning.
Props to Mats for his excellent craftsmanship!!
If you want to learn more about Mats’ process, be sure to check out this article.
Stay up to date on all things tile!
please consider subscribing to catch our latest articles before anyone else!