
Alright, so in the video above, I’m aiming to give you some useful shower installation tips, as I walk you through the entire install process, but more importantly, I’m breaking down the mindset behind it. Because setting tile isn’t just about sticking pieces to a wall — it’s about building a system that’s going to last. Feel free to watch the video or read on to learn these tips!
Before your shower installation even begins…
Before I even think about opening a bag of thinset, I want to know the foundation is right. This shower already has a proper waterproof system installed. That’s not optional. If you skip that or try to cut corners there, everything else you do is basically cosmetic. Water is relentless. It will find the smallest weakness and exploit it. Click here to read our latest article on waterproofing.
And click here to watch the waterproofing video on YT.
Layout
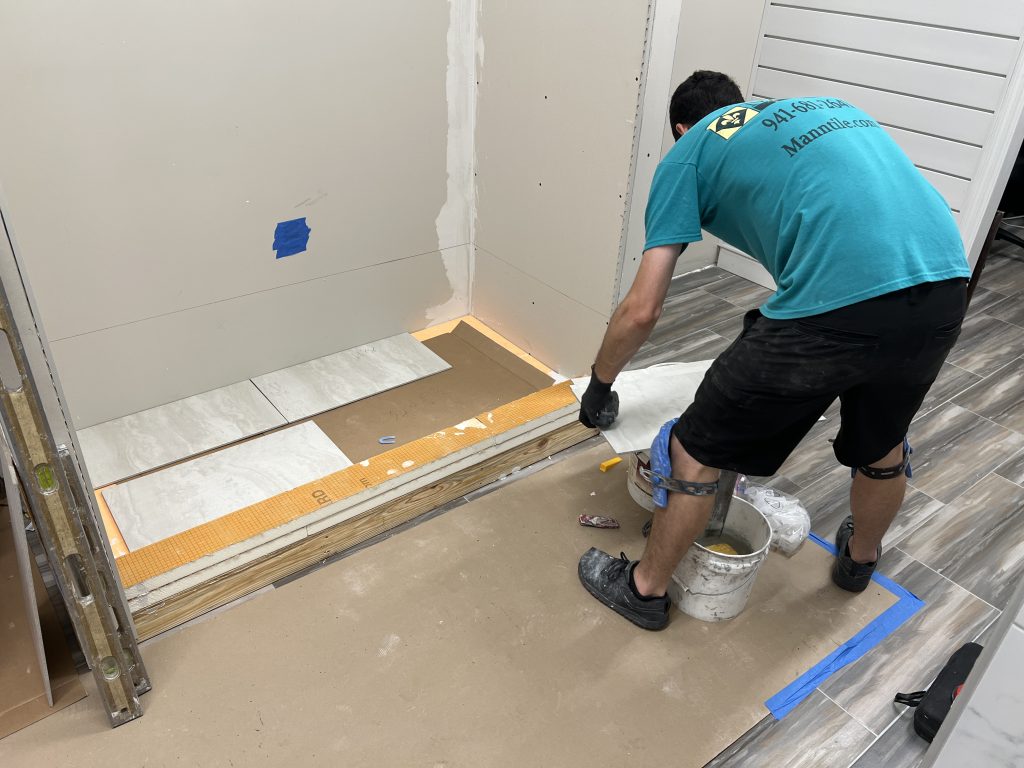
Once that’s confirmed, I shift my attention to layout. And this is where I see a lot of DIY installs go wrong. People get excited and start setting tile without really thinking through how it’s going to land visually. I slow down here. I dry-fit. I measure. I look at where my cuts will fall — especially at corners and edges. I’m thinking about symmetry, balance, and what someone will notice first when they walk into the bathroom.
After that, we start mixing mortar and actually setting tile. I talk through the thinset choice and why coverage matters so much. It’s not enough to just dab some mortar on the wall and press a tile into it. I’m using the right trowel size, combing the mortar in consistent ridges, and making sure I get solid contact. Every tile needs proper support behind it. Voids can lead to cracked tiles, loose spots, and failure down the road.
Level, Plumb and cuts.
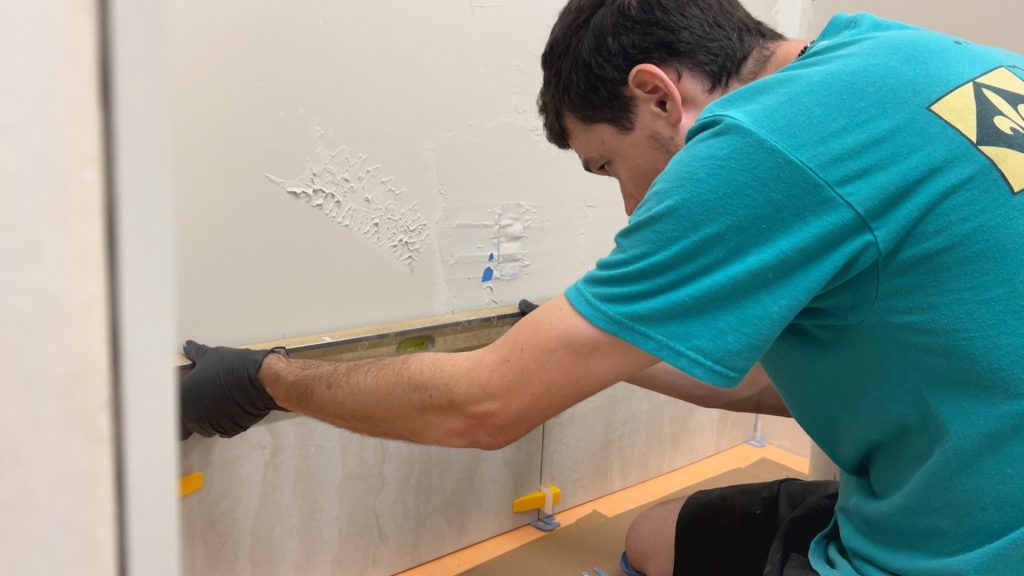
As I start building up the wall, I’m constantly checking for level and plumb. I don’t just set it and hope it’s straight. I check the first row carefully, because everything stacks off that line. If your base row is off even slightly, that error multiplies as you go up. So I’ll adjust as needed to keep everything clean and straight. It might feel slow, but that attention to detail is what makes the finished shower installation look sharp.
Cutting tile is another place where precision really shows. Around plumbing fixtures, valves, niches — those areas can either look polished or sloppy depending on how you handle them. I take my time making accurate cuts so everything fits tight and clean. When someone is standing in that shower every day, they’re going to see those details up close.
Sequencing matters too.
I prefer to work through the walls before moving to the shower floor. That lets me focus on getting the vertical surfaces solid first. Then when I move to the pan, I’m concentrating fully on slope and drainage. The shower floor isn’t just about appearance — it has to direct water exactly where it belongs. If the slope is wrong, you’ll get pooling or improper drainage, and that creates problems over time.
Throughout the shower installation, I’m reinforcing the idea that this isn’t a random collection of steps. It’s a process. Substrate, waterproofing, layout, mortar application, tile placement, cuts, sequencing — each piece builds on the last one. You can’t rush one stage and expect the overall system to perform well.
Conclusion
What I really want people to take away from this is that a quality shower install is about discipline. Slow down. Plan your layout. Use proper materials. Pay attention to details. The flashy part is the finished tile, but the real craftsmanship is in the preparation and precision along the way.
At the end of the day, the goal isn’t just to make it look good for photos. It’s to build something straight, solid, and built to handle daily use for years. If you approach your shower installation that way, you’re already ahead of the game.